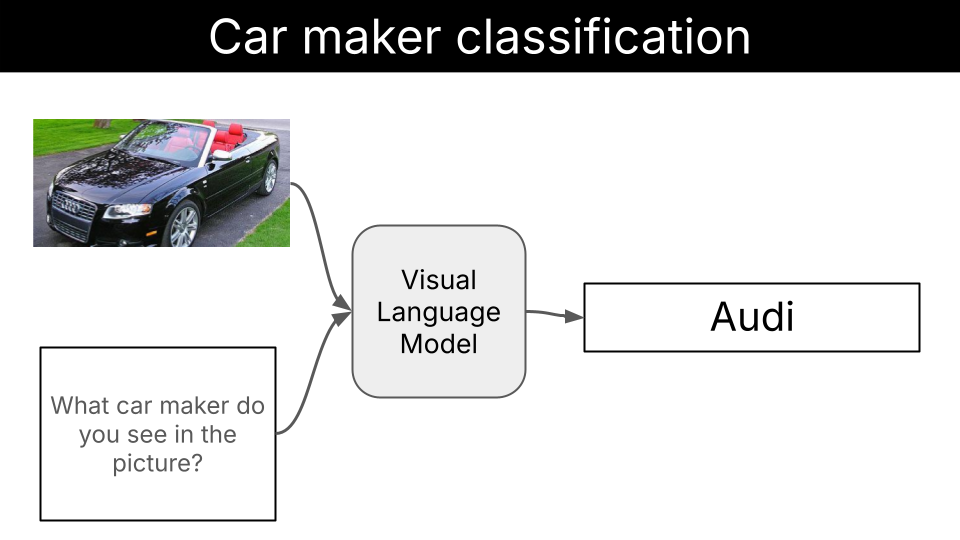
A step by step guide on fine-tuning a Vision Language Model for image identification tasks. The task we solve in this example is to identify the car maker from an image, but the learnings transfer to any other image classification task you might be interested in.Documentation Index
Fetch the complete documentation index at: https://mintlify.com/Liquid4All/cookbook/llms.txt
Use this file to discover all available pages before exploring further.
What you’ll learn
In this example, you will learn how to:- Build a model-agnostic evaluation pipeline for vision classification tasks
- Use structured output generation with Outlines to ensure consistent and reliable model responses and increase model accuracy
- Fine-tune a Vision Language Model with LoRA to further improve model accuracy
Quick start
Prerequisites
You will need:- uv to manage Python dependencies
- Modal for GPU cloud compute
- Weights & Biases (optional, but highly recommended) for experiment tracking
- make (optional) to simplify execution
Install uv
Install uv
- macOS/Linux
- Windows
Modal setup
Modal setup
- Create an account at modal.com
- Install the Modal Python package:
- Authenticate with Modal:
If the first command fails, try:
Weights & Biases setup
Weights & Biases setup
- Create an account at wandb.ai
- Install the Weights & Biases Python package:
- Authenticate with Weights & Biases:
This will open a browser window where you can copy your API key and paste it in the terminal.
Steps to fine-tune LFM2-VL for this task
Here’s the systematic approach we follow to fine-tune LFM2-VL models for car maker identification:- Prepare the dataset. Collect an accurate and diverse dataset of (image, car_maker) pairs that represents the entire distribution of inputs the model will be exposed to once deployed.
- Establish baseline performance. Evaluate pre-trained models of different sizes (450M, 1.6B, 3B) to understand current capabilities.
- Fine-tune with LoRA. Apply parameter-efficient fine-tuning using Low-Rank Adaptation to improve model accuracy.
- Evaluate improvements. Compare fine-tuned model performance against baselines to measure effectiveness.
Step 1: Dataset preparation
Dataset creation is one of the most critical parts of the whole project.A fine-tuned Language Model is as good as the dataset used to fine-tune it.
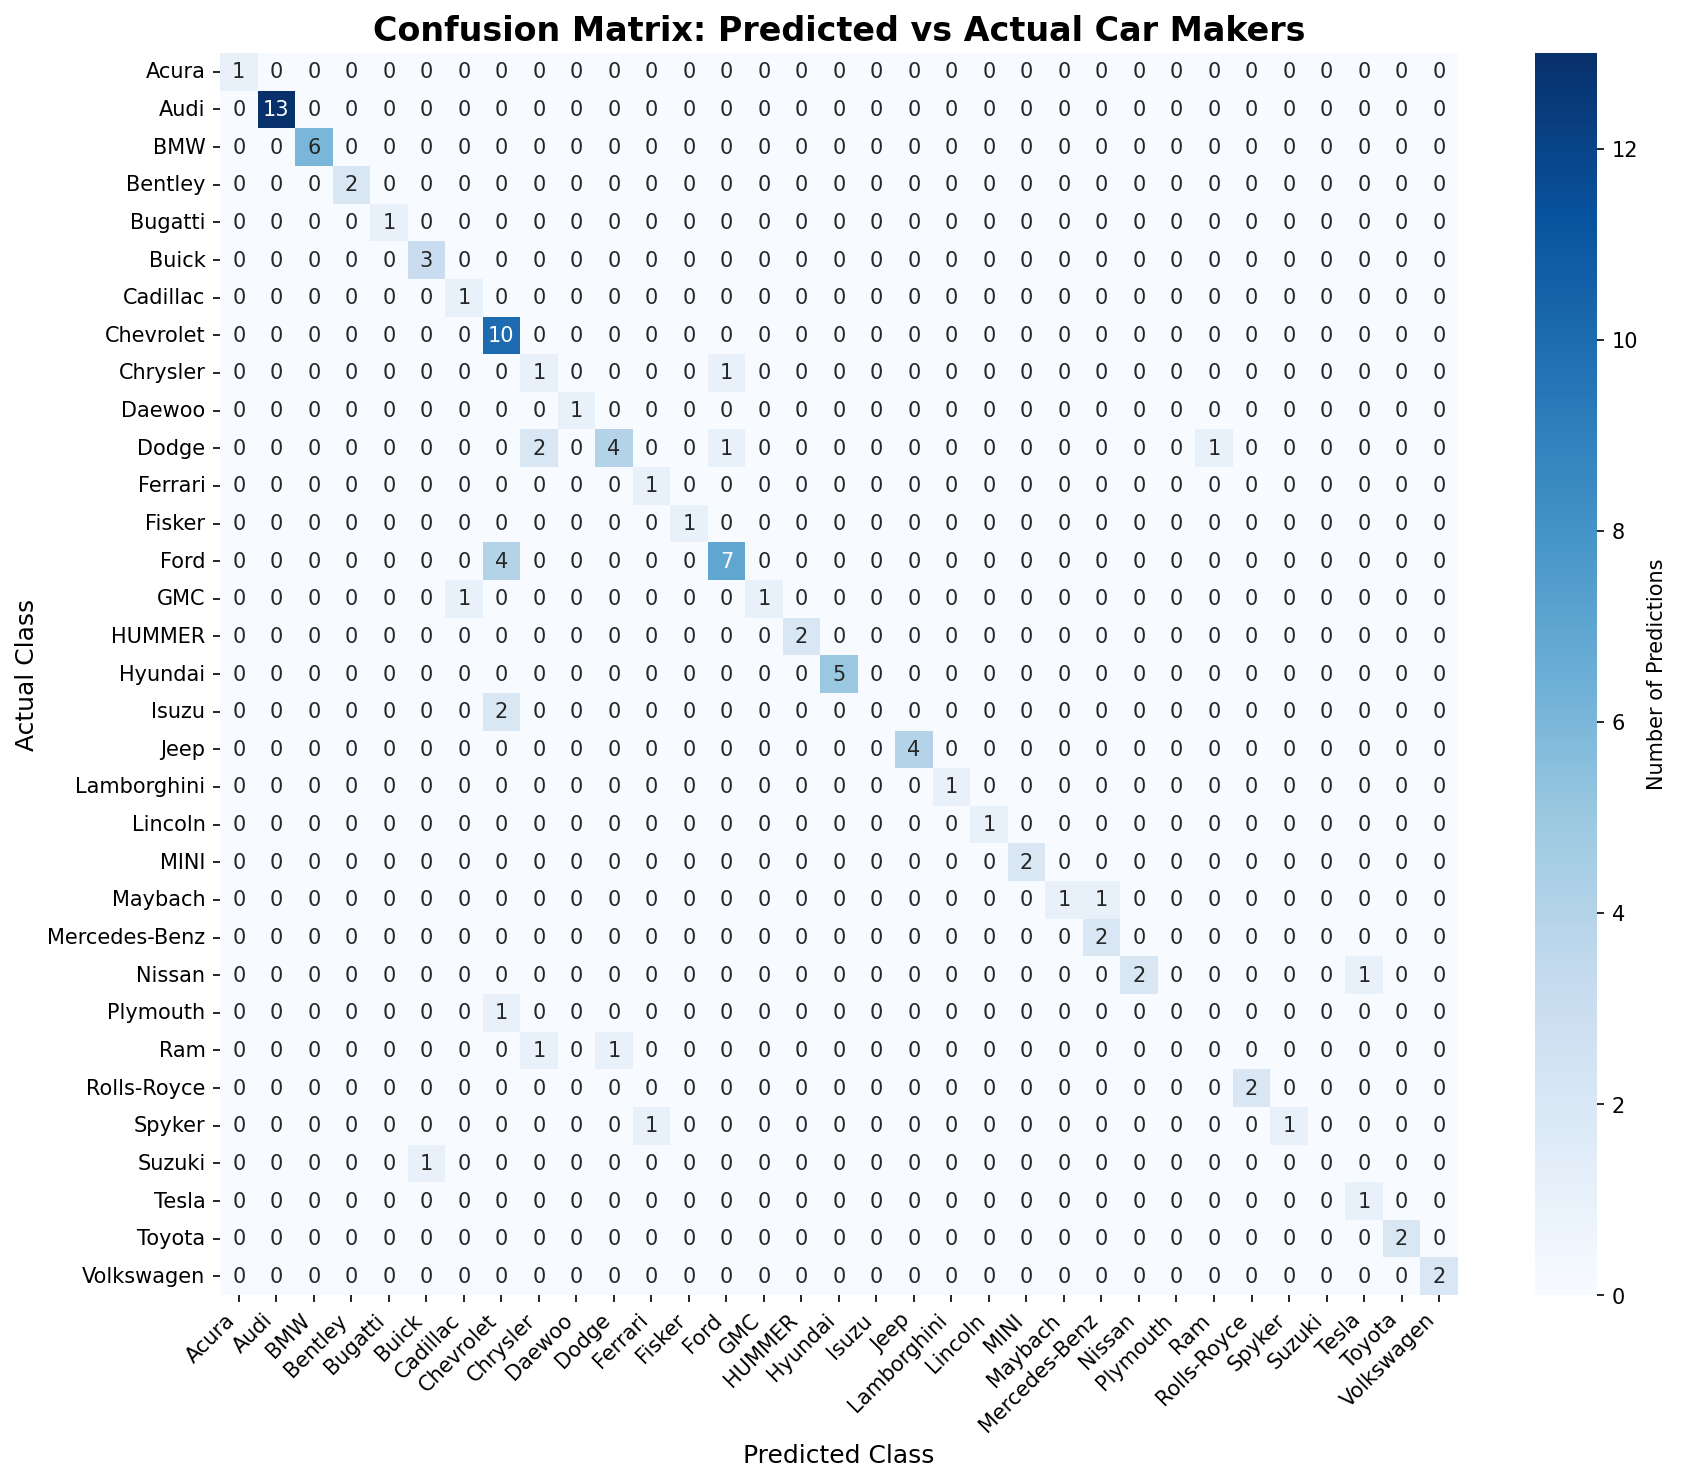
- Classes: 49 unique car manufacturers
- Splits: Train (6,860 images) and test (6,750 images) splits
Step 2: Baseline performance of LFM2-VL models
Before embarking into any fine-tuning experiment, we need to establish a baseline performance for existing models. We evaluate:- LFM2-VL-450M
- LFM2-VL-1.6B
- LFM2-VL-3B
Results
| Model | Accuracy |
|---|---|
| LFM2-VL-450M | 3% |
| LFM2-VL-1.6B | 0% |
| LFM2-VL-3B | 66% |
Step 3: Structured generation to increase model robustness
Structured generation is a technique that allows us to “force” the Language Model to output a specific format, like JSON, or in our case, a valid entry from a list of car makers.Language Models generate text by sampling one token at a time. At each step of the decoding process, the model generates a probability distribution over the next token and samples one token from it.Structured generation techniques “intervene” at each step of the decoding process, by masking tokens that are not compatible with the structured output we want to generate.

Results
| Model | Accuracy |
|---|---|
| LFM2-VL-450M | 58% |
| LFM2-VL-1.6B | 74% |
| LFM2-VL-3B | 81% |
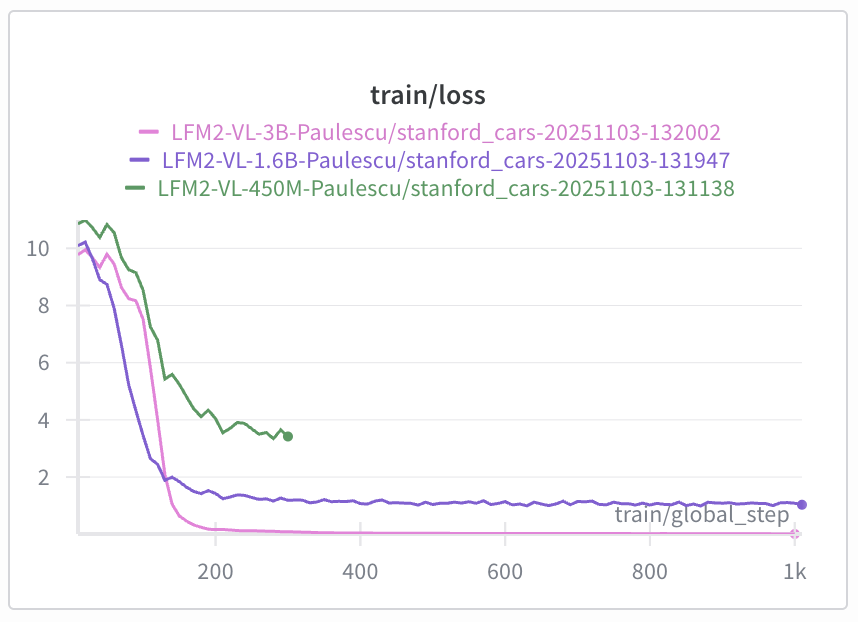
Step 4: Fine-tuning with LoRA
To fine-tune the model, we use the LoRA technique. LoRA is a parameter-efficient fine-tuning technique that allows us to fine-tune by adding and tuning a small number of parameters.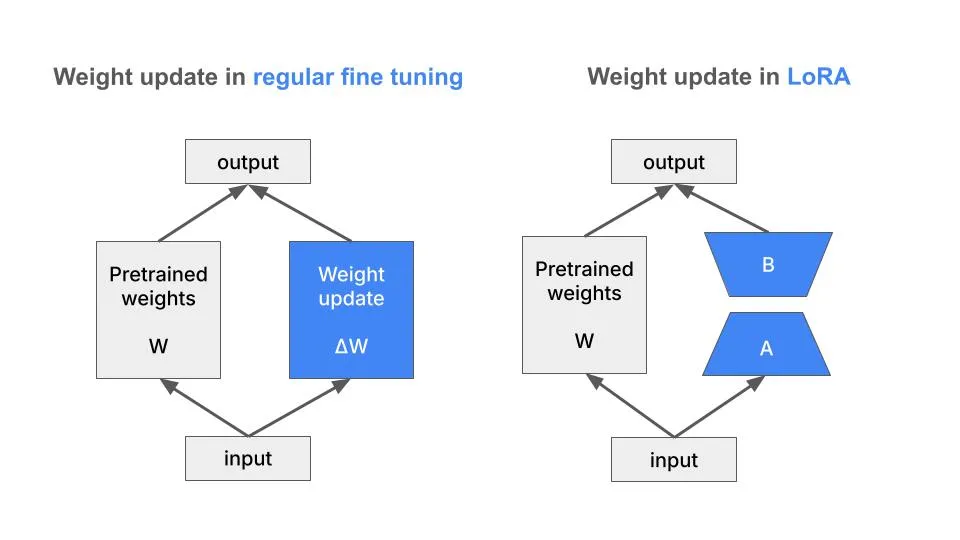
Evaluate the fine-tuned model on the test set
To evaluate the fine-tuned model:Results
| Checkpoint | Accuracy |
|---|---|
| Base Model (LFM2-VL-3B) | 81% |
| checkpoint-1000 | 82% |
What’s next?
To improve the dataset quality you can:- Increase quality by filtering out heavily cropped, occluded, or low-quality images where the brand isn’t clearly identifiable
- Increase diversity by doing data augmentation on the least represented classes