This example showcases how to run a local vision language model in the browser using the LFM2.5-VL-1.6B model and the ONNX runtime with WebGPU for GPU acceleration. You can find all the code in this Hugging Face Space, including a deployed version you can interact with 0 setup here.Documentation Index
Fetch the complete documentation index at: https://mintlify.com/Liquid4All/cookbook/llms.txt
Use this file to discover all available pages before exploring further.
This is a WebGPU-based vision-language model demo, so make sure you’re using a browser that supports WebGPU (like Chrome or Edge).
The traditional approach: Cloud-based inference
Typically, vision-language model inference follows a server-client architecture. Your application sends images and prompts to a cloud-hosted frontier model (like Claude, GPT-4V, or Gemini), which processes the request on powerful servers and returns the results:
- Privacy concerns: Images and data must be sent to external servers
- Latency: Network round-trips add delays, especially for real-time applications
- Cost: API calls accumulate charges based on usage
- Connectivity dependency: Requires stable internet connection
- Rate limits: Subject to API quotas and throttling
The local alternative: In-browser inference with WebGPU
This demo showcases a different approach: running a vision-language model entirely in your browser using WebGPU for GPU acceleration. The LFM2.5-VL-1.6B model (1.6 billion parameters, quantized) runs directly on your device without sending data anywhere.
Key advantages
- Complete privacy: All data stays on your device
- Low latency: No network overhead, ideal for real-time video processing
- Zero inference cost: No API charges after initial model download
- Offline capability: Works without internet connection (after model caching)
- No rate limits: Process as many frames as your hardware can handle
How to run the app locally
Verify npm is installed
Optional: Run with Docker locally
If you prefer to test the production build locally using Docker:http://localhost:7860 in your browser.
How to deploy the app to production
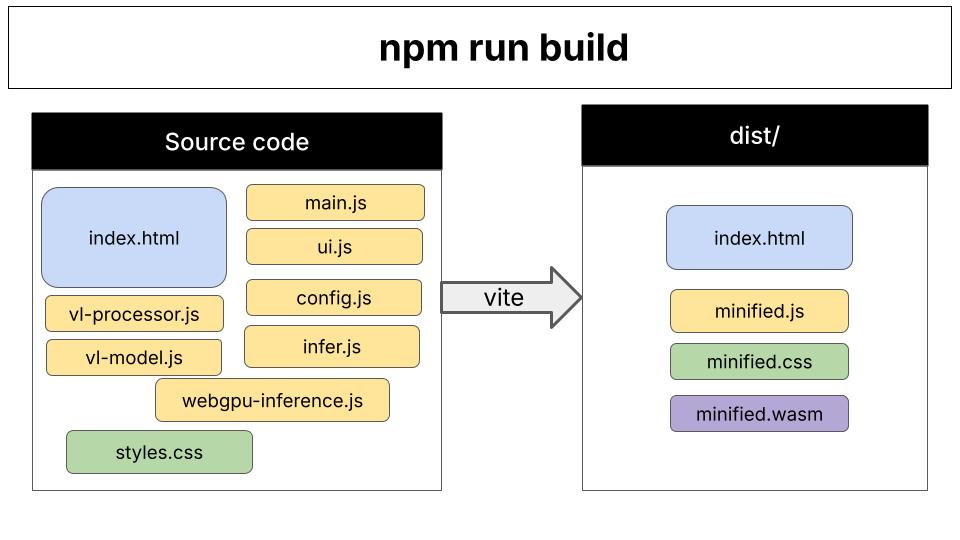
After runningnpm run build, you’ll have a production-ready bundle in the dist/ directory.
- HuggingFace Space (for demo purposes only). It automatically uses the Dockerfile at the root of the directory. You can see it in action here.
- Platform as a Service (PaaS): Vercel, Netlify
- Cloud storage + CDN: AWS S3 + CloudFront, GCS + Cloud CDN, Azure Blob + CDN
- Traditional web servers: nginx, Apache, Caddy
How the code is organized
Vite’s role: Vite is the build tool that bundles all JavaScript files and dependencies into optimized browser-ready code. During development (npm run dev), it serves files with hot-reload. For production (npm run build), it creates a minified bundle in the dist/ directory.
Code organization: The application follows a modular architecture with separation of concerns:
- Entry point (
index.html→main.js): Initializes the app, sets up event listeners, coordinates between modules - Configuration (
config.js): Model definitions, HuggingFace URLs, quantization options - Inference pipeline (
infer.js→webgpu-inference.js→vl-model.js):- Routes inference requests
- Manages model lifecycle and state
- Handles ONNX Runtime sessions and token generation
- Image processing (
vl-processor.js): Preprocesses webcam frames into model-ready patches and tensors - UI layer (
ui.js): Updates DOM elements, displays progress, shows captions
Frequently asked questions for non-Node.js developers
What does npm run do?
What does npm run do?
npm run executes custom scripts defined in the package.json file.In package.json, you define scripts in the “scripts” section:npm run dev- Runs “vite”npm run build- Runs “vite build”npm run preview- Runs “vite preview”
npm run is essentially npm’s task runner, letting you define and execute project-specific commands.What is Vite?
What is Vite?
Vite is a modern build tool that serves two purposes:
-
Development Server (
npm run dev): Serves your application locally with instant hot-reload when you edit code. Think of it like Flask’sdebug=Truemode or Django’srunserver- but optimized for JavaScript modules and incredibly fast. -
Production Bundler (
npm run build): Transforms and optimizes your source code (.js,.css, assets) into production-ready bundles that are minified, optimized, and efficient for browsers to load.
uvicorn --reload (fast dev server) with setuptools (build/packaging tool) into one lightning-fast tool specifically designed for modern web development.